Last year, we had a lot of snow in this area. To get my grandsons away from so much screen time (TV, computer, handheld video games) and out into the great outdoors, I researched and found the instructions for building a snow house.
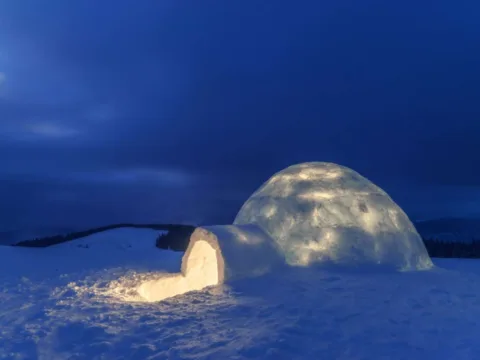
A snow house is made very similar to an igloo, except it is rectangular and doesn’t include a roof.
Check out this amazing video that shows how to build an igloo.
A snow house can be built anytime during the winter after there’s been a good snowfall and when temperatures dip below freezing.
Be sure to check the 7-day forecast to ensure that it will remain cold for several days after your snow house is built; otherwise, your snow house will melt away.
Here’s how the boys and I made 2 snow houses…
Materials Needed:

- Several hard, plastic boxes or totes. (We used recycling bins, but you could also purchase a snow block maker.)
- Non-stick cooking spray
- Lots of freshly fallen snow; wet snow is preferable (I will explain more about this later.)
- Tape measure
Making The Snow Molds:

First, coat the inside of the hard plastic boxes with the non-stick cooking spray.
Then, fill the boxes with snow.
If snow is wet…
Tamp it down as much as you possibly can. Once the snow block is packed tightly, turn the box upside down and remove it. You can now begin building your snow house.
If snow is powdery…
Fill the box, tamp the snow down as hard as possible and add water. Allow to freeze solid and remove. This may take overnight, which is why it would be best to have several boxes to use as molds, rather than just one.
Snow House Construction Steps:
1. Using the measuring tape, measure to set up the corners of the snow house.
TIP: A good size for a snow house is 10 x 12 feet. This gives kids lots of room to move around. Plus, they may want to share the snow house with their friends.
2. Dig a furrow between the corners to set up the snow block foundation.
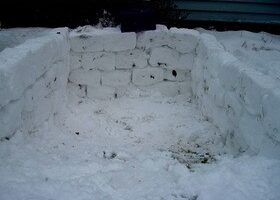
3. Lay the first row of snow blocks, being sure to leave an opening for an entry.
TIP: Try to get the foundation blocks as level as possible. This will make the snow foundation strong. A level can be used to do this. If your snow house is not level, use shims to make it so.
4. Once the snow block foundation is finished, begin laying the second row of snow blocks. Be sure to keep the walls as level and straight as possible.
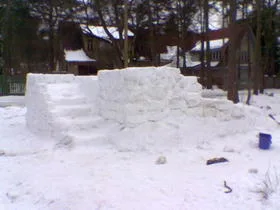
5. Use some creativity and imagination when creating the snow house. You may want to add windows or an archway over the entry.
6. Continue adding snow blocks until you have reached the desired height. In our case, the walls of the 2 snow houses we built were approximately 4 feet high, and we placed them 12 feet apart.
TIP: We also walked through the woods and cut evergreen branches for the roof of the snow houses. It was a lot of fun.
It took us an entire day to build both snow houses. Temperatures stayed cold for over a month, and the boys enjoyed many happy days in the great outdoors!
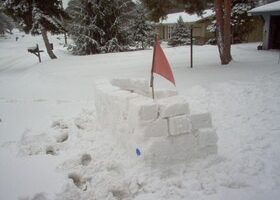
The boys also enjoyed making piles of snowballs and defending their “castles”.
Many snowball wars took place between the 2 snow houses. They had friends over almost every day. No one heard them complaining about no screen time; as soon as they finished their breakfast in the morning they wanted to be outside.
The boys still talk about building those snow houses with me. It is a memory that will stay with them throughout their lives. Today, they build their own snow houses and have learned some advanced tricks about leveling and plumbing the walls.
Ahh… the lessons learned about how to build things while having a lot of fun at the same time!